A step-by-step guide on creating administrator users in the Microsoft Management Console (MMC):
Niagara is a password sensitive system and some users have problems connecting to their local host’s platform. We often receive numerous support queries through our support portal related to this issue. A common issue is where users obtain a domain login like Microsoft 365 which does not grant the user full administrative access to the PC. Niagara binds platform access to a user that has full admin authority to the operating system. Another common cause is where the user has not be been given admin rights to the pc due to IT policies. If this is the case consult your IT department before proceeding.
Niagara’s requirements, a password with a minimum length of 8-10 characters, including at least one uppercase letter and one special character, is necessary. Additionally, it is crucial that the Windows user logging in possesses Administrator rights for the system.
If you encounter any challenges with this, we highly recommend referring to the following guide.
Step 1: Opening the Microsoft Management Console (MMC)
To get started, press the Windows key + R on your keyboard. This will open a dialog box called ‘Run’. Type in ‘mmc‘ and hit Enter. This action will launch the Microsoft Management Console.
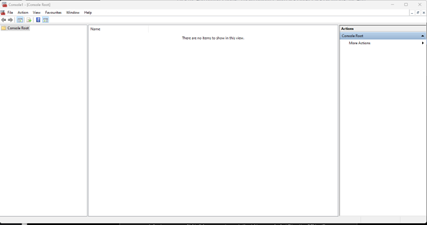
Step 2: Adding the Local User to MMC Group
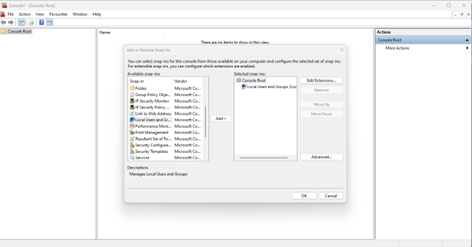
Next, we need to include the local user in the MMC group. Follow these steps:
1. Go to the ‘File’ menu and select ‘Add/Remove Snap-in‘.
2. In the ‘Add or Remove Snap-ins’ dialog box, locate and choose ‘Local Users and Groups‘ from the list.
3. Click the ‘Add’ button.
4. Select ‘Local computer’ and click ‘Finish‘.
5. Finally, click ‘OK‘ to close the ‘Add or Remove Snap-ins‘ dialog box.
Step 3: Expanding ‘Local Users and Groups
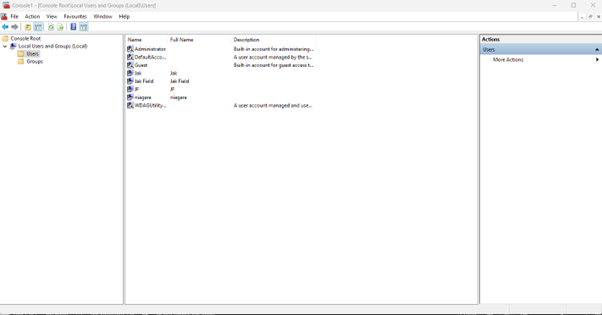
In the MMC window, follow these steps to expand the ‘Local Users and Groups‘ node and access the ‘Users‘ folder:
1. Locate the ‘Local Users and Groups‘ node in the left pane of the MMC window.
2. Expand the ‘Local Users and Groups‘ node by clicking on the small arrow or plus sign next to it.
3. Once expanded, you will see various folders. Click on the ‘Users’ folder.”
Step 4: Creating a New User
1. Right-click on an empty area in the middle pane of the MMC window.
2. From the context menu, select ‘New User.’
3. This action will open the ‘New User’ dialog box.”
Step 5: Entering User Details
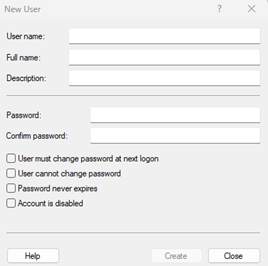
In the ‘New User’ dialog box, fill in the following details for the new administrator user:
Username: Enter the desired username for the new user.
Full Name: Provide the full name of the user.
Description (optional): Add a description if desired.
Make sure to uncheck the “User must change password at next logon” option.”
Step 6: Setting the User Password
1. Click on the “Password” field in the ‘New User‘ dialog box.
2. Enter the desired password for the user. Ensure you use a strong password.
3. Similarly, click on the “Confirm Password” field and re-enter the password for confirmation.
4. If you want the password to never expire, select the “Password never expires” checkbox.
Step 7: Assigning the User to the Administrators Group
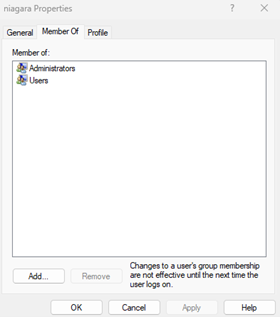
1. In the ‘New User‘ dialog box, navigate to the ‘Member Of‘ tab.
2. Click on the “Add” button to open the ‘Select Groups‘ dialog box.
3. In the ‘Object Name‘ field, type “Administrators” and click the “Check Names” button.
4. Once the name is verified, select the “Administrators” group from the search results.
5. Click OK to confirm the selection.
Step 8: Completing the User Creation
1. Click OK in the ‘New User’ dialog box.
2. This action will create a new administrator user.
3. You will now see the newly created user listed in the right pane of the MMC under the ‘Users’ folder.“
Step 9: After successfully creating the administrator user, you can proceed to close the MMC window.”
That’s it! You have successfully creating an administrator user using the MMC. The newly created user now possesses administrative privileges on the local machine.”
